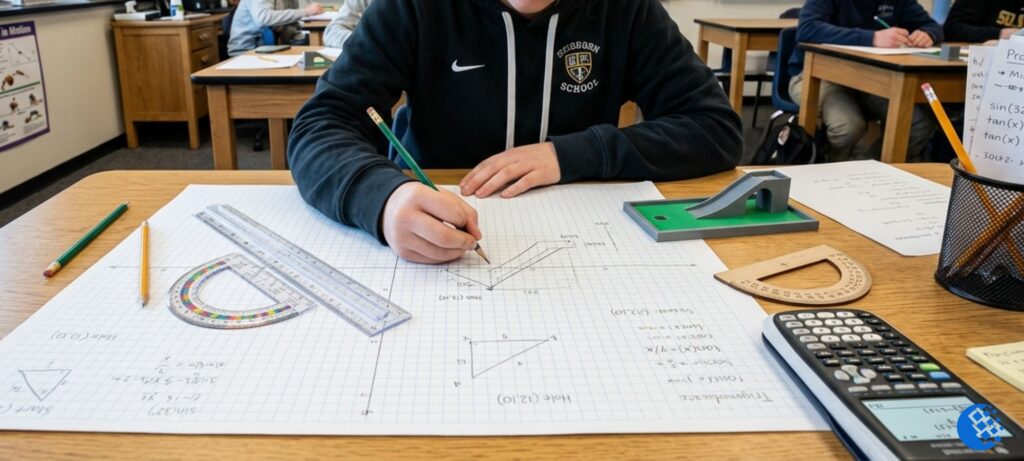
Let’s face it: sitting in a classroom listening to abstract math theories can get incredibly boring. That is exactly why teachers love assigning the mini-golf trigonometry project. Instead of just staring at triangles on a whiteboard, you are forced to use geometry and algebra to design an actual, playable game. The objective sounds simple enough: calculate the exact path, angles, and distances a golf ball needs to travel to hit a guaranteed hole-in-one.
But once you start sketching out the bank shots, you quickly realize that a lot can go wrong. A single misplaced decimal point or a miscalculated angle means your ball flies off into a wall instead of dropping into the cup. Let’s break down the core math behind this assignment so you can ace your project without pulling your hair out.
What Is a Mini Golf Trigonometry Project?

At its core, a mini golf trigonometry project is a real-world math application that turns a standard coordinate grid into a miniature golf course. Your job is to treat the golf ball’s path of motion as a geometric problem. When you hit a golf ball and bounce it off a wall, its trajectory creates a series of predictable right triangles.
This project isn’t just a random way to pass the time in class; it’s an exercise in geometric modeling and problem-solving. It mirrors how professionals use spatial math in the real world every day. For example, educators working as a Special Education Itinerant Teacher frequently have to design customized, hands-on spatial activities to help students grasp abstract math concepts. Whether you are building a physical cardboard model or drafting a digital map, you are using coordinate geometry to turn an abstract formula into something you can physically see and test.
Core Concept: The Law of Reflection
Before you can calculate a single angle, you have to understand the foundational rule of the entire project: the Law of Reflection.
Imagine you are playing a game of pool. When you hit the ball directly against the side cushion, it doesn’t just stop or bounce back at a random trajectory. It bounces off the cushion at the exact same angle it hit it.
The Golden Rule: The Angle of Incidence (the inbound angle hitting the wall) always equals the Angle of Reflection (the outbound angle bouncing away).
Plaintext
       Inbound Path             Outbound Path
            \                         /
             \                       /
              \                     /
               \   Angle = Angle   /
________________\_______|_______/________________
                      Wall
When you draw a straight line perpendicular to the wall at the point of impact, you instantly create two identical, mirroring right triangles. Once you have a right triangle, the entire world of trigonometry opens up to you.
Key Trigonometry Formulas Used
To find your mini golf trigonometry project answers, you only need a handful of reliable math tools. Keep these formulas written down at the top of your draft sheet:
1. The Primary Trigonometric Ratios (SOH CAH TOA)
When you know at least one side length and an angle of your bounce triangle, you can find everything else using standard ratios:
$$\sin(\theta) = \frac{\text{Opposite}}{\text{Hypotenuse}}$$
$$\cos(\theta) = \frac{\text{Adjacent}}{\text{Hypotenuse}}$$
$$\tan(\theta) = \frac{\text{Opposite}}{\text{Adjacent}}$$
2. Inverse Trigonometric Functions
If you already know the side lengths of your course layout but have no clue what angle to aim your putter, you turn to inverse functions:
$$\theta = \tan^{-1}\left(\frac{\text{Opposite}}{\text{Adjacent}}\right)$$
3. The Pythagorean Theorem
Need to figure out the literal distance the ball will travel along a diagonal path? If you have a 90-degree triangle, use this classic:
$$a^2 + b^2 = c^2$$
Step-by-Step Mini Golf Trigonometry Solution
Let’s map out how to actually complete the assignment from start to finish. If you follow this exact sequence, your project layout will practically write itself:
- Plot the Coordinates: Start by drawing your course on a piece of graph paper or a digital grid. Assign coordinate points $(x, y)$ to your starting tee, the hole, and any obstacles in the way.
- Draw Your Target Path: Draw a straight line from the tee to a specific point on the wall, and then another straight line from that wall point directly to the hole.
- Isolate Your Triangles: Drop a straight vertical or horizontal line from your start and end points to the wall to outline your right-angled triangles.
- Measure the Straight Sides: Count the grid blocks or use simple subtraction between coordinates to find the base and height of your triangles.
- Calculate the Aiming Angle: Use your inverse tangent formula to figure out the exact degree configuration your putter needs to face.
- Check Your Work: Ensure the outbound angle leaving the wall matches your inbound angle perfectly. If they don’t match, your ball won’t go in the hole.
Example Mini Golf Trigonometry Problem (With Answers)
Let’s look at a concrete sample problem so you can see how this works in practice.
Imagine your ball is sitting at the starting tee at coordinates $(0, 3)$. The hole is located down the green at $(8, 5)$. You want to make a clean, single-wall bank shot off the flat wall running along the x-axis ($y = 0$).
Plaintext
  y
  |
5 |                  (Hole)
4 |                 /
3 |  (Tee)         /
2 |     \         /
1 |      \       /
0 |_______X_____/_______ x
  0  1  2  3  4  5  6  7  8
First, we need to find the exact point on the wall ($X$) where the ball needs to strike. Because the inbound and outbound angles must match, the ratio of the vertical distance to the horizontal distance for both triangles must be equal.
The tee is 3 units above the wall. The hole is 5 units above the wall. The total horizontal distance between them is 8 units.
Using simple linear proportions:
$$\frac{3}{x} = \frac{5}{8 – x}$$
$$3(8 – x) = 5x$$
$$24 – 3x = 5x \implies 8x = 24 \implies x = 3$$
This tells us your ideal target point on the wall is exactly at coordinates $(3, 0)$.
Now let’s find the exact angle ($\theta$) you need to aim. Look at the first triangle formed between the tee $(0, 3)$ and the wall point $(3, 0)$. The side opposite to the wall angle is 3 units (horizontal run), and the side adjacent is 3 units (vertical drop).
$$\tan(\theta) = \frac{3}{3} = 1$$
$$\theta = \tan^{-1}(1) = 45^\circ$$
The Final Project Answer: You must aim your ball at a precise $45^\circ$ angle toward the wall coordinate $(3, 0)$ to secure your hole-in-one.
How to Design Your Mini Golf Course Using Trigonometry
If your teacher gives you total creative freedom to design a custom geometry mini golf project, don’t make it needlessly impossible for yourself. Start simple and layer in the complexity.
Begin by planning a straightforward, one-wall bank shot to get a feel for the math formulas. Once your first hole is locked down, try designing a more advanced two-wall bank shot or adding a central square obstacle. Every single time the ball hits a new flat surface, just stop, draw a new right triangle, and reset your formulas based on the new point of impact.
Always keep a clean, scaled drawing as your master copy. If your scale is messy, your math won’t save you when it comes time to build or present the final layout.
Common Mistakes Students Make
If your project calculations aren’t adding up, you probably fell into one of these incredibly common traps:
- Mixing Up Opposite and Adjacent Sides: Always look directly across from your target angle to find the true “opposite” side. Don’t just guess based on which line looks longer on your paper.
- Calculator in Radian Mode: This ruins more math project grades than anything else. Make sure your calculator is explicitly set to Degrees (DEG) before calculating inverse trig functions, or your angles will make zero sense.
- Forgetting About Ball Width: In a real-world setting, a golf ball isn’t a microscopic point on a grid. It has actual physical volume. While most classroom projects let you ignore this, forgetting that the ball hits a wall from its edge rather than its center can cause real-world testing versions to miss the mark.
Mini Golf Trigonometry Project Answers (Explained)
When search engines see people hunting for mini golf geometry project answers, they are usually looking for a shortcut to copy down. But here is the trick: every single course layout assigned by teachers uses different grid coordinates. There is no single master answer key.
The secret to getting the right answers every single time is simply verifying your triangle symmetry. If your inbound calculation says you hit the wall at $38^\circ$ but your exit calculation requires an outbound path of $42^\circ$ to reach the hole, your path is physically impossible. The law of reflection doesn’t bend. If the angles don’t match, you need to slide your wall impact point left or right along the axis until both triangles balance out perfectly.
Real-Life Applications of This Project
This project might feel like an isolated classroom puzzle, but understanding how angles bounce off surfaces is a massive component of modern industrial design.
Engineers use these exact same reflection models to map out how sound waves travel inside concert halls, how lasers rebound off mirrors in optical equipment, and how radio signals bounce off communication towers. Even software developers building modern video game physics engines have to write code based on the law of reflection to ensure objects bounce realistically.
Before engineers can build complex physical structures or systems safely, they must complete extensive training. Many spatial designers and technical project managers start with foundational safety courses like the Foundations in Health and Safety e-Learning curriculum to ensure their physical environments and calculations meet rigorous workplace standards.
FAQs
What is a mini golf trigonometry project?
It is a practical math assignment where students design a miniature golf course layout on a coordinate grid, using right triangles and trigonometric ratios to chart a perfect hole-in-one shot.
How do you solve mini golf trigonometry problems?
You solve them by breaking the ball’s path into right-angled triangles at every point where it hits a wall. From there, you apply SOH CAH TOA or the Pythagorean theorem to find the missing paths and degrees.
What formulas are used in a mini golf trigonometry project?
The most common formulas you will need are the basic tangent ratio, the inverse tangent function to find hitting angles, and the Pythagorean theorem to figure out total ball travel distance.
What are mini golf trigonometry project answers?
Because every student designs a unique course layout, there isn’t a universal answer sheet. The correct answer for your specific project is the exact coordinate point on the wall and the corresponding angle that allows the ball to bounce safely into the cup.
How does reflection work in mini golf math?
It relies entirely on the Law of Reflection. This rule states that a ball will bounce off a flat wall at the exact same angle it used when it struck the wall, creating perfectly symmetrical geometric triangles.
Final Thoughts: Take it One Triangle at a time
When you first look at a blank sheet of graph paper and try to map out a wild, multi-wall bank shot, the project can feel completely overwhelming. The easiest way to get through it is to take a deep breath and take things one single bounce at a time.
Don’t try to solve the entire course layout in a single, massive calculation. Map out the first straight line, find where it hits the wall, solve that single right triangle, and then use that new position to map out your next move. By keeping your drawings clean and your calculator in degree mode, you’ll breeze through the math and build an awesome project.