Most homes have one. The spare room that started as a guest room, slowly became the place where things go when nobody knows where else to put them, and now holds a treadmill, three boxes from the last move and a desk you can’t actually sit at.
It’s also often the best study space in the house. It has a door, it’s away from the kitchen and the TV, and nobody else is using it. If your teenager is doing homework at the dining table, or you’re taking an online course from the couch, clearing that room out is one of the most useful projects you can take on before the next term starts.
Here’s how to do it without it turning into a three-month saga.
Start by Deciding What the Room Is For
Before you move a single box, get clear on who will study there and what they’ll do. A high school student writing essays needs a desk, a good chair, decent light and somewhere to keep books. A college student taking exams online needs a quiet corner with a plain wall behind the camera. A parent working on a certification at night might need a reading chair more than a second monitor.
That answer tells you what stays. Anything that doesn’t serve the room’s new job is a candidate to leave, even if it’s perfectly good. The exercise bike might be fine. It just doesn’t belong in a study.
Sort Everything Into Keep, Move, Donate and Toss
Work through the room one corner at a time rather than pulling everything into the middle at once. That way the room stays usable if you have to stop halfway, and you won’t end up with a mountain on the floor that sits there for weeks.
Use four simple piles. Keep is anything that belongs in the finished study. Move is stuff you want but that should live somewhere else, like holiday decorations that belong in the garage. Donate is anything in good shape that you no longer need. Toss is broken, worn out or simply not worth giving away.
Be honest about the boxes. If a box has been taped shut since your last move and you can’t remember what’s in it, open it, but don’t let it pull you into an afternoon of nostalgia. Make a quick call on each item and keep going.
Deal With the Old Electronics Properly
Spare rooms collect electronics. Old laptops, a printer that hasn’t worked in years, tangled chargers, a monitor from two computers ago. These shouldn’t go in the household trash, partly because many contain materials that are better recovered and partly because old drives can still hold personal files.
Wipe or remove storage from any old computer first. Then check the EPA’s guide to electronics donation and recycling, which explains where working devices can be donated and where broken ones can be recycled. Many electronics retailers and local recycling centers take them, sometimes for free.
If one of those old laptops still runs, it might even make a decent second screen or a dedicated device for studying, with no games or social apps on it to get in the way.
Get the Bulky Stuff Out in One Go
The hardest part of a spare room is usually the big items. A futon frame, a broken dresser, an old mattress leaning against the wall. These are the things that stall the whole project, because they don’t fit in the car and nobody wants to carry them down the stairs.
You can schedule a bulk pickup with your city if it offers one, rent a trailer and make a dump run, or list the decent pieces online and wait for someone to collect them. If you’d rather have it gone in a single afternoon, a local junk hauling crew is often the quickest route. In the Boise area, for example, Top Shelf Mobile can load up furniture, boxes and old equipment from the room and take it away, sorting out donations and recycling along the way.
Whichever route you pick, try to get every large item out the same week. A room that’s half empty still feels like storage. A room that’s fully cleared starts to feel like a place you’d actually sit and work.
Set Up the Room for Focus
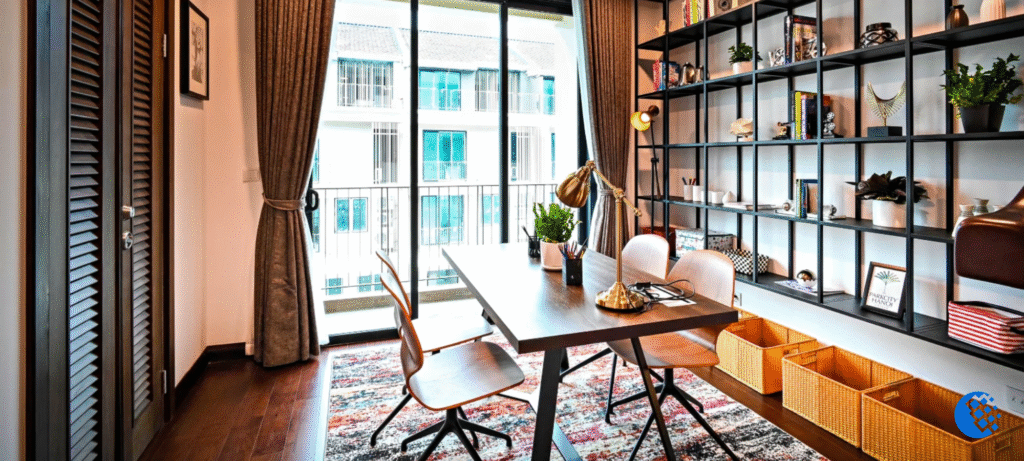
Once it’s empty, resist the urge to fill it straight back up. Start with the essentials: a desk with enough surface to spread out notes, a chair that supports a few hours of sitting, and lighting that doesn’t leave the desk in shadow. Natural light is great if you have it, but a good desk lamp matters for evening study.
Put the desk where the person studying won’t be facing a pile of anything. A clear wall, a window or a simple bookshelf works better than a view of the laundry basket. Keep only the supplies that get used every week within reach, and store the rest in a closed cabinet or drawer.
The same ideas that help in schools apply at home. Easygrader’s piece on creating more focused learning environments covers how layout, seating and quiet zones help students settle in, and most of it scales down to a single bedroom.
Keep It From Filling Up Again
Clutter comes back when a room loses its purpose. The easiest way to protect the new study is to make it clear to everyone in the house that this is a study now, not overflow storage. If something gets set down in there that doesn’t belong, it moves out the same day.
A quick five-minute reset at the end of each week helps too. Clear the desk, file loose papers, return books and take out anything that drifted in. It sounds small, but it’s the difference between a study space that lasts a school year and one that’s buried again by midterms.
A Room That Earns Its Space
Turning a spare room into a study isn’t about buying new furniture or following a design trend. It’s mostly about taking things out. Decide who the room is for, sort what’s in there, handle the electronics responsibly, get the big items gone in one push and set up only what the work needs.
Do that over a weekend or two, and the room that used to hold everything nobody wanted can become the one place in the house where real work gets done.