
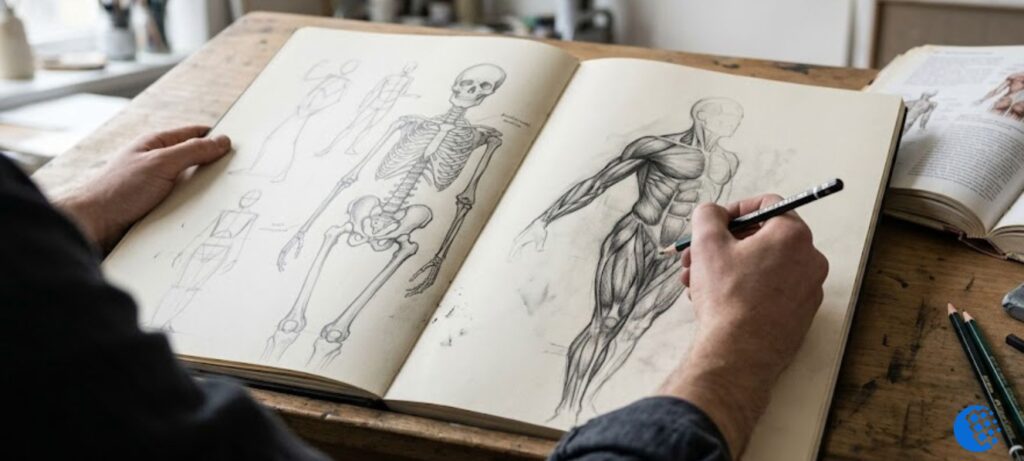
Most people who go looking for an anatomy drawing class aren’t struggling because they don’t know enough muscle names. They’re struggling because their figures look flat, stiff, or “off” in a way they can’t quite pin down — and somewhere along the way, someone told them the fix is anatomy. That’s partly true. But anatomy on its own, memorized like a vocabulary list, rarely fixes a drawing. Understanding how the skeleton, the major muscle masses, and the body’s proportions actually behave when a person moves — that’s what changes the work.
This guide walks through what a real anatomy drawing class covers, how beginners should approach the subject without drowning in muscle diagrams, what to look for if you’re comparing courses, and how to build a practice routine even if you never take a class at all.
What Is an Anatomy Drawing Class?
An anatomy drawing class teaches artists how the human body is built — not for medical purposes, but for drawing purposes. That’s an important distinction. A medical course wants you to name every structure. A class built for artists wants you to understand which structures actually change the silhouette, the light and shadow, and the pose.
In practice, that means a class usually covers body proportions, the skeleton and its major landmarks, the large muscle groups that shape the surface of the body, gesture and movement, and how all of that holds together in a full figure. Some classes lean traditional — pencil and paper, life models, long study sessions. Others are built for digital artists working toward character design, illustration, or concept art. The underlying subject is the same either way.
What Do You Learn in an Anatomy Drawing Class?
Human proportions and body structure
Proportion is usually where a class starts, and for good reason. Before you can place a muscle correctly, you need a sense of how long the arm is relative to the torso, where the midpoint of the body falls, how the head relates to the rest of the figure. Get proportions wrong and no amount of muscle detail will save the drawing.
Skeleton and anatomical landmarks
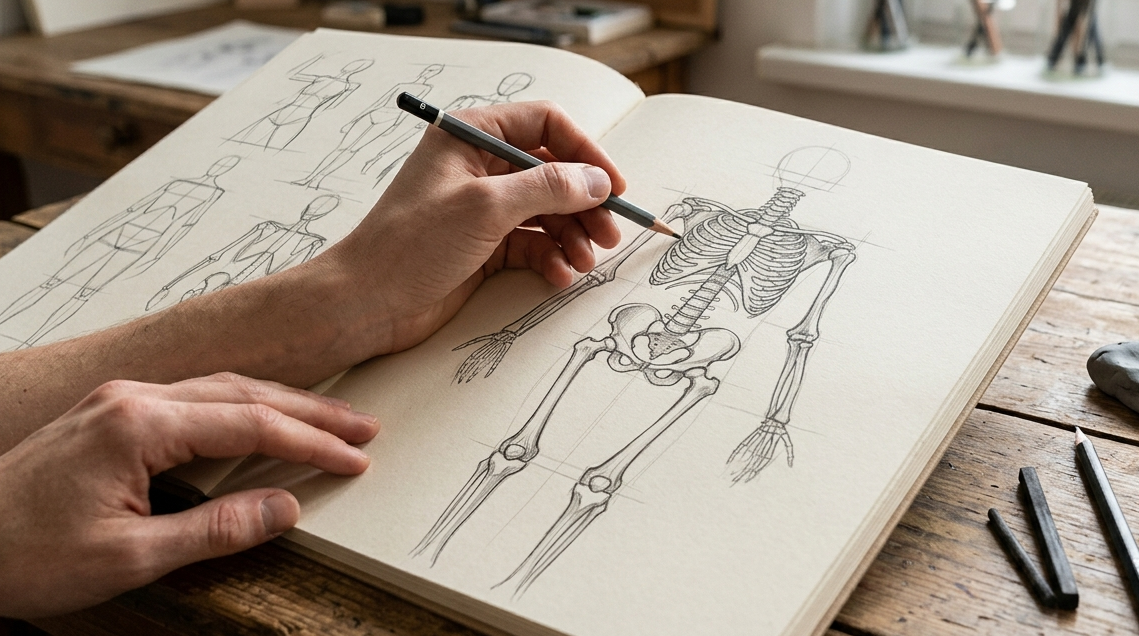
The skeleton is the part most beginners want to skip, and it’s the part that matters most. Bones don’t stretch or compress the way muscle does, so they give you fixed reference points — the clavicle and scapula around the shoulder, the humerus, radius and ulna down the arm, the ribcage, the pelvis, the femur, tibia and fibula down the leg, and the kneecaps. A class will usually have you draw the skeleton in isolation, often starting from a simple human body diagram rather than a full reference photo, before layering anything on top of it — which feels slow at first but pays off fast.
Major muscle groups
Rather than memorizing every named muscle, most well-taught classes group muscles into large masses — the deltoid capping the shoulder, the trapezius across the upper back and neck, the pectorals across the chest, the latissimus dorsi fanning across the back, the biceps and triceps wrapping the upper arm, the quadriceps and hamstrings along the front and back of the thigh, the gluteal muscles shaping the hip, and the gastrocnemius forming the calf. This is closer to how the body actually reads visually. You’re not drawing individual muscles so much as drawing the shapes they create together.
Gesture and movement
A skeleton alone is static. Gesture is what makes a figure feel like it’s mid-action rather than frozen. Classes typically introduce quick gesture drawing early and keep coming back to it, because it’s the skill that keeps anatomical knowledge from turning into stiff, overworked figures.
Torso, pelvis and rib cage
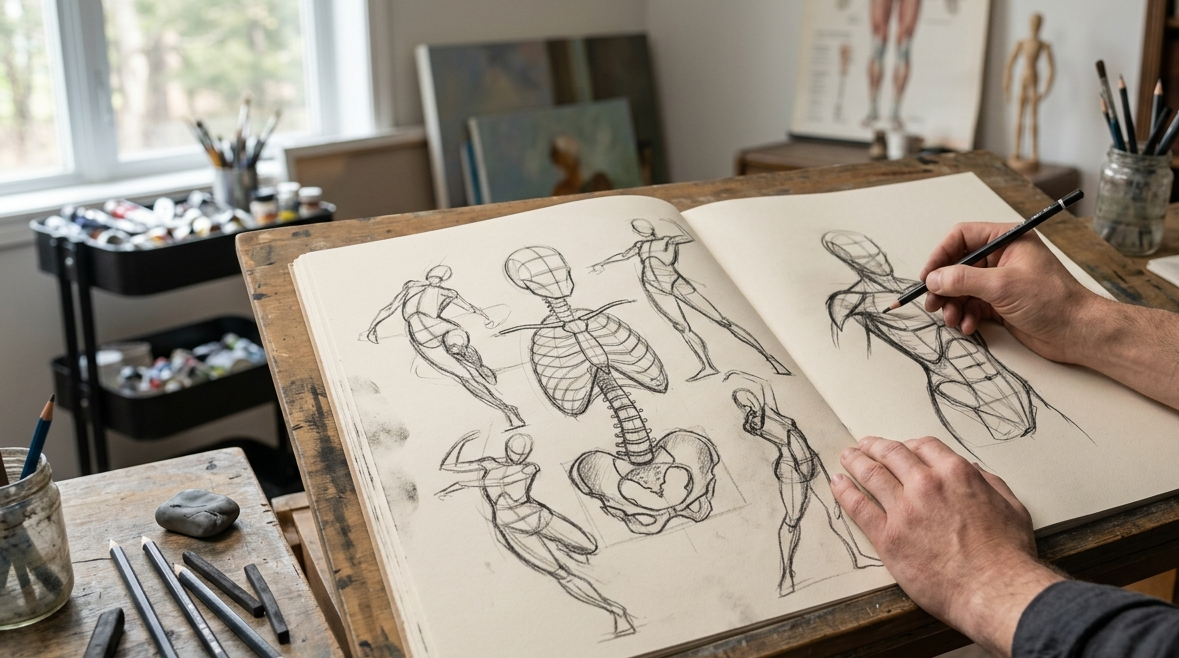
The torso is where a lot of beginner drawings fall apart, mostly because it gets treated as one flat block instead of two connected masses — the rib cage and the pelvis — that twist and tilt independently of each other. Once that clicks, poses stop looking wooden. Some artists also study rough internal organ placement inside the rib cage and abdomen at this stage, not for medical accuracy, but because it reinforces that the torso is a hollow, three-dimensional volume rather than a flat panel with a spine drawn down the middle.
Arms, hands, legs and feet
Limbs get their own dedicated attention, usually because they’re the hardest parts to draw convincingly. Hands especially — most artists, even experienced ones, admit hands take the longest to feel natural.
Head and neck anatomy
Facial anatomy and the way the neck connects the head to the shoulders round out a full anatomy curriculum, though some classes treat this as a separate course entirely.
Foreshortening and perspective
Once the basics are in place, classes usually move into foreshortening — drawing a limb or torso that’s angled toward or away from the viewer. This is where anatomical understanding actually gets tested, because you can’t rely on memorized shapes anymore. You have to understand the underlying form well enough to rotate it in your head.
Anatomy Drawing Class for Beginners
If you’re starting from zero, the order matters more than the content. A reasonable progression looks like this:
- Gesture drawing
- Basic proportions
- Simple 3D forms (boxes, cylinders, spheres)
- Skeleton
- Major body masses
- Major muscle groups
- Anatomical landmarks
- Full poses
- Foreshortening
- Detailed studies
The mistake a lot of beginners make is jumping straight to step six — trying to memorize muscles — before they’ve built any sense of gesture or proportion. It’s a bit like trying to learn grammar before you know any vocabulary. The muscle names stick for a week and then evaporate because there’s no drawing skill underneath them to hang the information on. This is really a case of motor learning playing out on paper — the hand needs repetition before the eye’s knowledge translates into something the hand can actually do.
For most beginners, the biggest jump in quality doesn’t come from learning more muscle names — it comes from spending less time on memorization and more time checking three things on every drawing: where the rib cage sits relative to the pelvis, whether the gesture line still reads once the details go in, and whether the pose would actually hold a person’s weight. Those three checks catch more problems than any anatomy chart does.
How to Choose the Right Anatomy Drawing Class
Not every course is built the same way, and price doesn’t always track with quality. A few things worth checking before you commit:
- Does the curriculum have a clear order, or is it a pile of unrelated videos?
- Does the instructor actually demonstrate drawing, not just talk over diagrams?
- Are there practice assignments, or is it passive viewing only?
- Is feedback available in any form?
- Does the course match your current level — beginner, intermediate, or advanced?
- Is it built for traditional media, digital, or both?
- Do you get lifetime access, or does it expire?
- Is there any personal critique of your own work, or just pre-recorded lessons?
- Does completing the course lead to a certificate, and does that actually matter for your goals?
A class that skips practice assignments entirely is usually going to leave you with a head full of theory and no real change in your drawings. Anatomy sticks through repetition, not through watching someone else draw it once.
It also helps to think about who you are as a learner before you enroll. A complete beginner needs a course that starts at “how to hold a pencil,” not one that jumps into muscle origin points on day one. A game artist or character designer usually wants anatomy taught alongside pose and silhouette, since that’s what the job actually demands. A fashion illustrator needs accurate proportions more than deep muscle detail, since the figure is a base for clothing, not the finished piece. Matching the course to that kind of goal matters more than matching it to a star rating.
A Few Real Anatomy Drawing Courses Worth Knowing About
It helps to see how this plays out in actual courses rather than in the abstract. Before naming specific ones, it’s worth mapping out the general categories they fall into:
| Course type | Best for | Learning style | Feedback |
|---|---|---|---|
| Structured online anatomy course | Beginners to intermediate | Self-paced video lessons | Depends on the course — some include critique, some don’t |
| Live anatomy or figure drawing class | Beginners to intermediate | Instructor-led, scheduled | Usually immediate, in the room |
| Life drawing class | Ongoing figure-drawing practice | Live model sessions | Direct, but informal |
| Free tutorial series | Budget-conscious, self-directed learners | Sequential videos or articles | Usually none |
A handful of well-known options illustrate the first category specifically. Vladimir London and Natalie Richy’s Anatomy Master Class is built around roughly two dozen video lessons covering proportions, skeleton, muscles, and portrait anatomy, with instructor critique included as part of the package — a traditional, classically-oriented approach for artists who want a single structured resource rather than piecing one together themselves. Details like pricing and lesson count can change, so it’s worth checking the current listing rather than relying on this summary alone.
Steve Huston’s Art Anatomy for Beginners on New Masters Academy takes a six-week, week-by-week route — the shoulder girdle one week, the torso the next, limbs after that — built on the constructive tradition associated with older figure-drawing authorities like George Bridgman and Burne Hogarth. It leans on downloadable practice assignments rather than passive watching, and the course page itself recommends taking it before or after other figure-drawing courses in the same catalog, which is worth checking if you’re going that route.
Newer entrants like the 92learns figure drawing and anatomy course organize the material into a longer sequence — drawing basics, skeletal structure, muscle mechanics, then limbs, torso, and facial features in separate modules — aimed more at people heading toward concept art, character design, or game illustration than traditional fine art.
For the free-tutorial category, series like My Drawing Tutorials’ figure drawing lessons show what a genuinely sequenced free resource looks like — proportions, then perspective, then a manikin figure, then anatomical detail layered on top, lesson by lesson.
None of these is objectively “the best” — they’re built for slightly different learners, which is exactly why the checklist above matters more than any single recommendation. Course pricing, curriculum details, and availability change over time, so treat the summaries here as a starting point for your own research rather than the final word.
Online Anatomy Drawing Classes vs In-Person Classes
Both formats teach the same material, but the experience is different enough that it’s worth thinking through before you pick one.
| Feature | Online Class | In-Person Class |
|---|---|---|
| Schedule | Flexible, rewatchable | Fixed times |
| Feedback | Varies by course | Usually immediate |
| Cost | Often lower | Often higher |
| Life models | Rare | Common |
| Practice structure | Self-directed | Structured, guided |
| Best for | Independent learners | People who need accountability |
If you’re someone who follows through on self-paced work, online is usually the more efficient route — you can pause, rewatch a section on the pelvis three times, and move at your own speed. If you learn better with a room full of people and a model in front of you, an in-person anatomy drawing class or life drawing session is going to get you further, faster, even at a higher cost. People searching for something like an anatomy drawing class near me — or specifically in a city with a dense art scene like New York — usually have more options than they expect once they check local art schools and community studios directly, rather than relying on generic search listings.
Can You Learn Anatomy Drawing for Free?
Yes, and a fair number of working artists built their foundation almost entirely on free material. YouTube has extensive anatomy drawing tutorials, some from professional illustrators who post full breakdowns for free. Libraries carry anatomy drawing books that were the standard reference before online courses existed — Sarah Simblet’s Anatomy for the Artist is one of the more commonly recommended ones, alongside older classics from Bridgman and Hogarth mentioned earlier. Museums and university programs sometimes post open lecture material.
The catch with free resources isn’t quality — some of it is excellent — it’s structure. You might find a strong lesson on the pelvis on Monday and something completely unrelated on Tuesday, with no thread connecting them. That’s the actual value a paid course usually provides: order, not information you couldn’t get elsewhere.
There are exceptions. A few free tutorial series are deliberately sequenced — building a simplified figure from basic 3D shapes in one lesson, then layering muscle detail onto that same figure in the next, then adding shading the day after. That kind of step-by-step free series is close to a paid course in structure, just without the certificate or personal feedback at the end.
If budget is the main constraint, free resources plus a self-imposed structure (something close to the ten-step progression above) will get you most of the way there.
Rockhe Kim’s Anatomy Drawing Class
Rockhe Kim’s anatomy drawing class is one of the more frequently searched named resources on this topic, largely because of its beginner-focused approach and the fact that an English-language version made it accessible outside Korea, where it originated. People searching for it specifically are usually looking for a structured, visually clear introduction to figure anatomy aimed at people with little to no prior drawing background.
Beyond that, it’s worth being careful about what gets claimed regarding any specific course — pricing, exact contents, and availability change, and the safest approach is to check the current official listing directly rather than relying on secondhand summaries. It’s also worth flagging plainly: searching for free PDF copies of paid anatomy books floating around unofficial archive sites isn’t something worth doing, both for basic fairness to the person who made the material and because those files are often incomplete or altered.
If you’re evaluating whether a class like this fits you, the same checklist from earlier applies — does it match your level, does it include practice structure, does the format (video, book, or both) suit how you actually learn.
Best Anatomy Drawing Practice Exercises
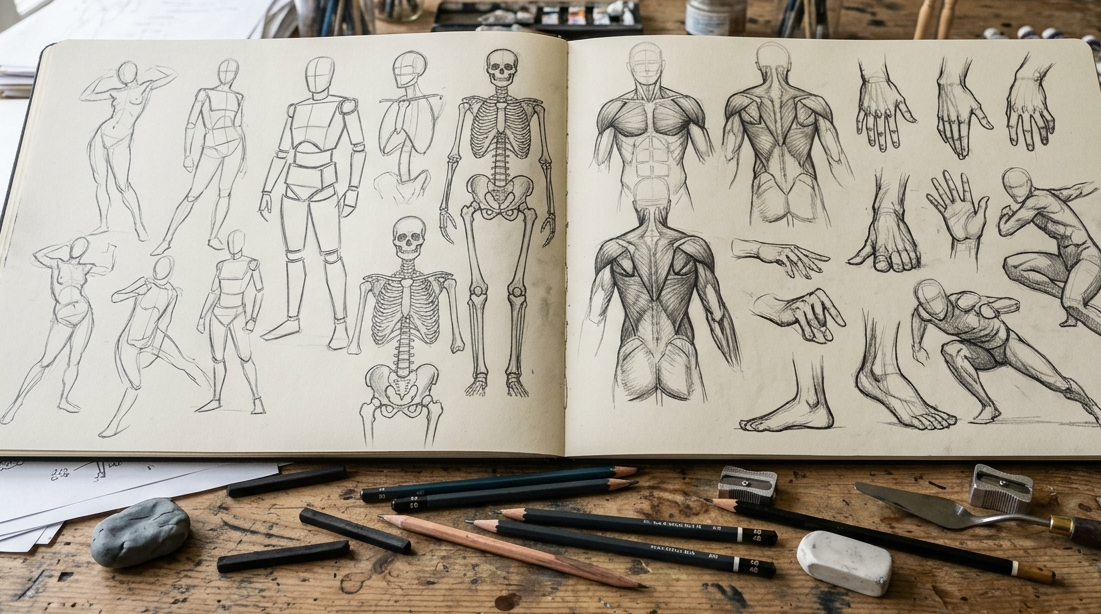
These are the exercises that show up again and again in serious anatomy curricula, roughly in the order they’re useful to a beginner. Most of them lean on tactile, hands-on repetition rather than passive study — which is exactly why watching tutorials alone rarely produces the same improvement as actually drawing every day.
1. Gesture drawing. Thirty seconds to two minutes per pose. Builds a feel for movement and weight before detail gets involved. Common mistake: adding detail during a gesture drawing, which defeats the point.
2. Mannequin figures. Simplified stick-and-block figures that establish proportion and basic pose without anatomical detail yet. Develops spatial thinking.
3. Box and cylinder construction. Breaking limbs and the torso into simple 3D shapes. This is what makes foreshortening possible later. Common mistake: skipping this and going straight to outline drawing, which falls apart the moment the pose gets complicated.
4. Rib cage and pelvis studies. Drawing these two shapes in isolation, from multiple angles, until their relationship to each other feels automatic.
5. Skeleton studies. Full skeletal figures, ideally from photo reference, focused on landmarks rather than every individual bone.
6. Major muscle mass studies. Layering the big muscle groups over a skeleton you’ve already drawn correctly.
7. Hands and feet. Isolated, repetitive practice. There’s no shortcut here — it’s mostly volume.
8. Head anatomy. Skull structure first, then major facial planes.
9. Foreshortened poses. Deliberately choosing reference photos where a limb points at the camera. Uncomfortable at first, but this is where real understanding gets tested.
10. Memory drawing. Studying a reference for a minute, then drawing it from memory. Reveals exactly what you’ve actually learned versus what you were only copying.
How to Draw Realistic Anatomy
Realistic anatomy doesn’t come from rendering every visible muscle — it comes from getting the underlying structure right before any surface detail goes on. A workable process looks like this: start with the gesture line to establish movement, block in rough proportions, construct the rib cage and pelvis as two separate volumes connected by the spine, build the limbs as simplified cylinders, mark the major anatomical landmarks (collarbones, kneecaps, shoulder points), add the major muscle masses over that structure, check the whole figure against your reference for perspective and foreshortening errors, and only then add surface detail through light and shadow.
Skipping straight to surface rendering — shading in muscle definition on a figure that was never structurally correct underneath — is the single most common reason anatomy studies look busy but still feel wrong.
Common Anatomy Drawing Mistakes
- Memorizing muscles without understanding form. You can name every muscle in the arm and still draw a stiff, flat arm if you never learned how those muscles create three-dimensional volume.
- Ignoring gesture entirely. Figures built purely from construction shapes, with no gesture underneath, tend to look mechanical.
- Treating the torso as one flat shape. The rib cage and pelvis move independently. Locking them together as a single block kills the sense of movement.
- Drawing muscles as separate stickers. Muscles overlap and blend into each other. Drawing them as distinct, sharply outlined shapes is a common early-stage habit that’s worth unlearning early.
- Weak hands and feet. Usually from avoidance rather than lack of ability — they just take more repetition than most people expect.
- Copying reference without understanding it. Tracing a pose without knowing why the shapes work the way they do means the skill doesn’t transfer to a new pose.
A Simple 30-Day Anatomy Drawing Practice Plan
This isn’t a guarantee of mastery in a month — nobody gets there that fast — but it’s a reasonable structure for building real momentum.
- Days 1–5: Gesture drawing and basic proportions, 20–30 minutes a day.
- Days 6–10: Rib cage, pelvis, and spine studies from multiple angles.
- Days 11–15: Arms and legs, focused on construction shapes and major joints.
- Days 16–20: Major muscle masses layered over previous skeleton studies.
- Days 21–25: Head, hands, and feet — the parts most people avoid.
- Days 26–30: Full figure studies combining everything, plus memory drawing to test retention.
Adjust the pace freely. Some people need six weeks to get through this comfortably, and that’s fine — consistency matters more than speed.
Anatomy Drawing Class FAQs
What is the best way to learn anatomy for drawing?
Combine structured study — proportions, skeleton, major muscle groups, in that order — with regular life drawing or photo-reference practice. Neither theory alone nor practice alone gets you there as fast as both together.
Can beginners take an anatomy drawing class?
Yes. Most classes are built with beginners in mind, and starting with structured instruction is usually faster than trying to piece it together from scattered tutorials.
How long does it take to learn anatomy drawing?
Basic proportions and forms typically click within a few weeks of regular practice. Real comfort with poses and foreshortening usually takes several months. Confident, flexible anatomical drawing is a multi-year skill for most people.
Can I learn anatomy drawing for free?
Yes — YouTube tutorials, library books, and public reference material can cover most of the same ground as a paid course. What you lose is built-in structure, which you’d need to create yourself.
What should I learn first in anatomy drawing?
Gesture and basic proportions, before anything involving individual muscles or bones.
Is anatomy drawing difficult? It’s difficult in the sense that you’re tracking several things at once — proportion, three-dimensional form, and how the body changes with movement. It gets easier once those become automatic rather than something you’re consciously solving for every line.
What is the difference between figure drawing and anatomy drawing?
Figure drawing is the broader practice of drawing the human form, often from a live model. Anatomy drawing is more specifically about understanding the internal structure — skeleton and muscle — that shapes what you see on the surface.
What is anatomy study in drawing?
It’s the practice of learning the body’s structure — bones, muscles, proportions, and how they shift with movement — specifically to improve figure drawing, not to pass a biology exam. Artists study only what changes the surface form, which is a much smaller set of information than a medical anatomy course would cover.
Should I study the skeleton before muscles?
Generally yes. The skeleton gives you fixed landmarks that muscles then attach to and wrap around. Studying muscles without that foundation tends to produce shapes that float without any real structure underneath.
Are online anatomy drawing classes worth it?
For self-directed learners, usually yes — the flexibility and lower cost tend to outweigh the lack of live feedback.
How do I practice anatomy drawing every day?
Short, consistent sessions beat occasional long ones. Twenty to thirty minutes daily, rotating through gesture, structure studies, and full figures, builds retention better than a single three-hour session once a week.
Where can I find anatomy drawing references? Photo reference sites, life drawing sessions, anatomy books with photographic plates, and figure reference apps are all common sources. Pose-reference platforms built specifically for artists tend to be more useful than generic stock photos.
How can I draw realistic human anatomy?
Build from the inside out — gesture, then structure, then major muscle masses, then surface detail — rather than trying to render realistic-looking skin and muscle definition on a figure that hasn’t been constructed properly underneath.
Final Thoughts
A good anatomy drawing class should make the human body easier to understand, not just give you more things to memorize. Whether you call it an anatomy drawing class, an anatomy class for drawing, or simply figure anatomy training, the actual work is the same. If you’re just starting out, put your energy into gesture, proportion, the skeleton, and the major body masses before worrying about individual muscle names. That order isn’t arbitrary — it’s the sequence that actually shows up in the drawings people improve fastest with.